Wesabe: The bank account
In addition to tracking my cash spending, I also feed Wesabe my bank transactions to get even more detailed spending reports. If your bank lets you download statements in OFX, Microsoft Money, or Quicken format, then you might be able to make use of Wesabe’s automatic account updating. If Wesabe won’t automatically update your bank account, or if their excellent privacy policy hasn’t won you over, you can also manually upload your account information. My bank only offers PDF and CSV statement downloads, so I need to do a bit of work to make things Wesabe-friendly.
Wesabe’s support team introduced me to XL2QIF, an excel macro that converts CSV files (or any excel spreadsheet) to QIF format. Once you open the CSV containing your transaction list in excel1, select the interesting fields in your statement:
Then open up the XL2QIF window:
Next, check the fields you’ve selected in the order in which they appear. (i.e. I choose Date first, Memo second, Debit third, and Credit last). I check “Separate Debit/Credit”, since my bank statements have separate columns for debits and credits. These options will all be saved the next time you run XL2QIF. Choose an output file and click convert to save your transactions to a QIF file.
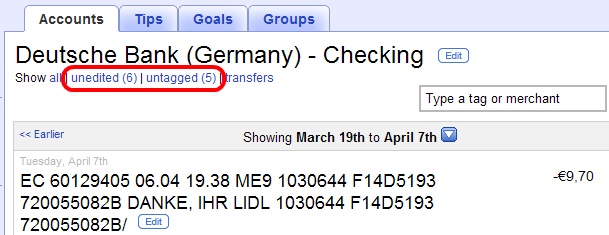
Now you can upload your QIF file to Wesabe. You’ll be asked for your account’s current balance, because we’re not using one of the more advanced file formats. Wesabe should now show new untagged or unedited transactions in your bank account:
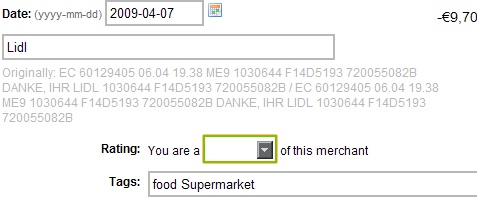
Once you’ve used Wesabe for a little while, it should start automatically tagging your transactions. I edit my new transactions and rename them to something meaningful:
Together with your cash account, you should now be able to track almost all of your spending with Wesabe. Â Be sure to mark your cash withdrawals as transfers so you don’t double-count your spent cash.
1 European CSV (Comma Separated Value) files are separated with semicolons, not commas. My current workaround for this is to rename the CSV file to a txt file, open the txt file in excel, and then change the delimiter to semicolon in the Text Import Wizard.
1 comment1 Comment so far
Leave a reply


[…] for Excel 1997. Simply highlight the cells containing the info you wish to upload, then open the XL2QIF add-in. I found quite a handy user-created tutorial, while Googling my dilemma, which you might […]